
Q: How do I render a video in Vegas Movie Studio suitable for using in DVD Architect Studio ?
Answer: The best way is to use the pre-prepared templates that are already in Vegas and to do a Manual Render. There are two main ways you can use to make a video suitable for a DVD.
*Please note that the core instructions in this article will also work for Sony Vegas Pro and DVD Architect Pro users.
Method One
The first method I have made a video tutorial for already, where I show how to use the inbuilt "Make Movie" button that is located in the top toolbar of Vegas Movie Studio HD Platinum 11 and 10. This is a semi-automated process where Vegas will render your video using an inbuilt template and then send the rendered video directly to DVD Architect Studio 5.0, ready to be turned into a DVD. This should be the easiest way to make a DVD, however if something goes wrong it can create a lot of confusion for a new user because often it is hard to find where your video has ended up on your computer. This normally leads to the new user attempting to re-render the project over and over again, going round and round in circles until you just give up and wish you never started.
Method Two
The second method is by far the easiest way in my experience to prepare a video for use in DVD Architect Studio 5.0 or DVD Architect Pro 5.2. Just to make everything absolutely clear, I will now show you with screen shots the full process & workflow from beginning to end.
Step 1 - Create a New Project in Vegas and set your Project Properties for Making a DVD
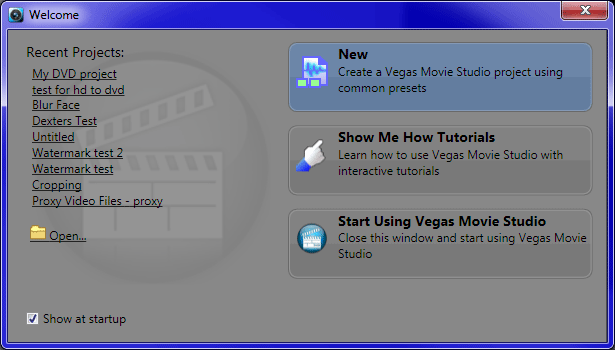
There are actually two ways you can start a New Project in Movie Studio Platinum.
a) You can use the New Project Wizard which will set your Project Properties to MATCH the Output Properties of your Rendered Video. Which means what you see in the Preview Window is exactly what you will see in the finished rendered video. This is an easy option for brand new users who maybe feeling a little overwhelmed. The instructions for this method start just below here are are labelled: Intructions for Starting a New Project - Method A
Example: If you are using/importing 1080p HD Video, Movie Studio will make the Preview Window 720x480 or 720x576, the same as what the rendering settings will be at the end.
b) The 2nd way you can start your DVD project, is to ingnore the New Project Wizard and MATCH the Project Properties exactly to the Video Files you are about to Import into the Project. The advantage of this method, is that it can make it easier for Movie Studio to play back the video files smoothly during editing, because it doesn't have to change the properties of the video. Setting the video properties for DVD production, can be left until the rendering stage right at the end. The instructions for this method are a little way down the page and will be marked: Intructions for Starting a New Project - Method B
Example: If you are using/importing 1080p HD Video, Movie Studio will make the Preview Window 1920x1080 during the time you will be editing your project. Only at the end when it comes to the rendering stage, will you then actually select a DVD Template like 720x480 or 720x576.
Instructions for Starting a New Project - Method A
Set your Project Properties in Vegas Movie Studio HD Platinum 11. For this example I will be using Version 11, but if you are still using Version 10 you should have no problems following along.
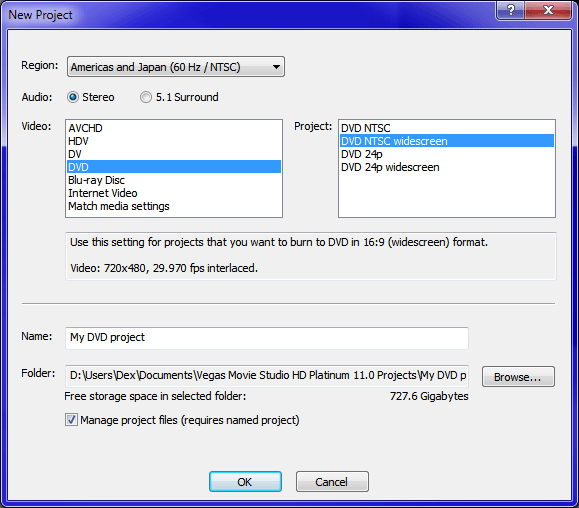 Settings for NTSC users
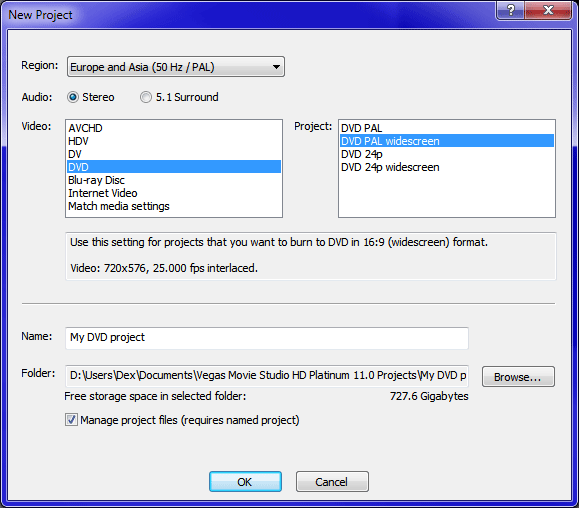 Settings for PAL users
At this stage you can jump straight to Step Two if you have just used the New Project Wizard shown above. If you skipped using the wizard then you will have to set the Project Properties manually by following Step Two that follows.
How to manually set and check the Project Properties for making a video suitable for DVD Architect Studio 5.0
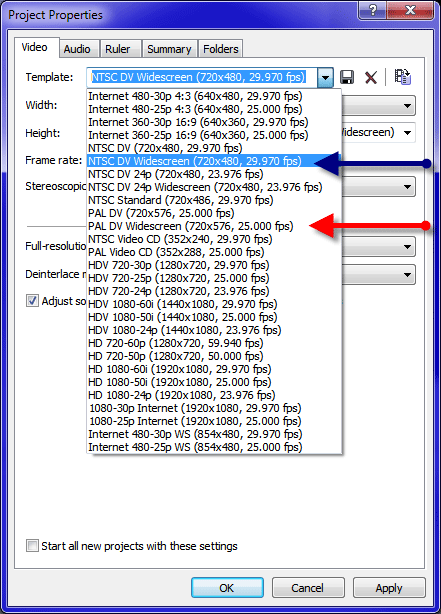 Blue Arrow shows NTSC Template and Red Arrow shows PAL Template - both for Widescreen Video Production
 NTSC Settings
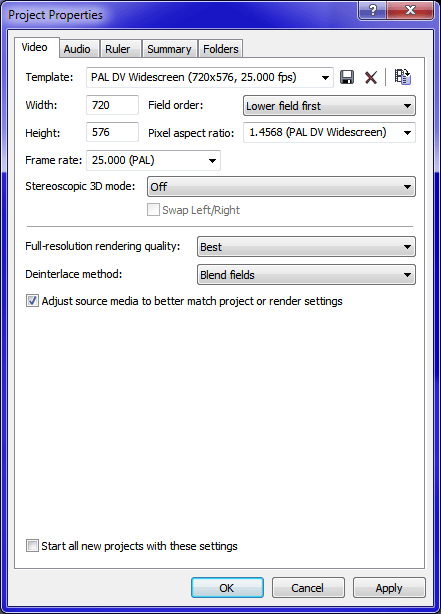 PAL Settings
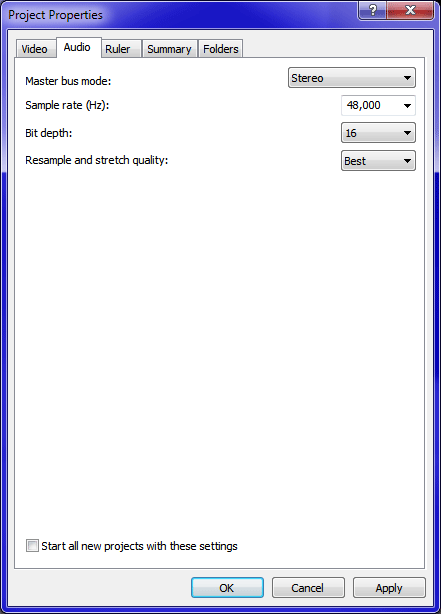 Audio Settings for PAL and NTSC users are exactly the same - always use 48,000Hz for DVD Making
Instructions for Starting a New Project - Method B
If you would like to start your project by simply MATCHING the Project Properties to the Video Files you will be using in your project, then do the following.
Import you Video Files into Movie Studio.
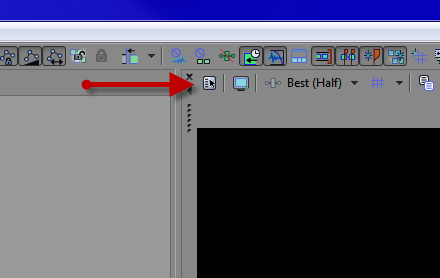
Press button to open the Project Properties window.
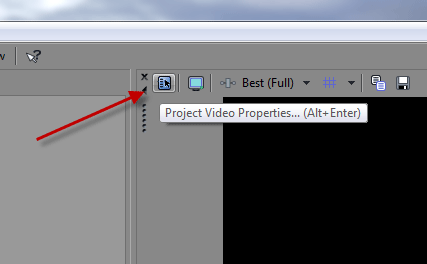
Now press the button that the red arrow is pointing to in screen shot below.
Navigate to one of the Video Files you just Imported and select it - OK
The Project Properties will now be matched perfectly, which will give you the smoothest playback in the Preview Window while you are editng.

Step 2a - Rendering the Video and Audio Files
When making a DVD you always render the Video and Audio components separately. The International Standard for making a DVD requires that you use MPEG2 video codec for the Video Component and Dolby Digital AC3 for the Audio Component. So when rendering a video that is going to be sent to DVD Architect Studio 5.0, you have to do TWO separate renders. The most important thing when doing this is to name both files EXACTLY the same and make sure they live in the same folder. The only thing that will be different about them is the file extension.
Follow the screen shots below to see which templates to choose for your two separate renders.
Update for Movie Studio Platinum 13 users
If you are using newer versions of Movie Studio like Movie Studio Platinum 13, the Render As function has been replaced with Make Movie. So to start rendering your video and audio files, go to Make Movie/Save to Hard Drive/Advanced - now you are in a similar Render As window as previous versions of the program.
To save Project Markers in version 13, you need press triangle next to Render Options to reveal further control settings. The first screen shot below is from version 13 and then all screen shots that follow are from older versions of program.

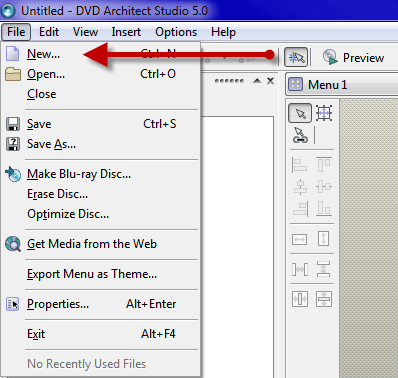
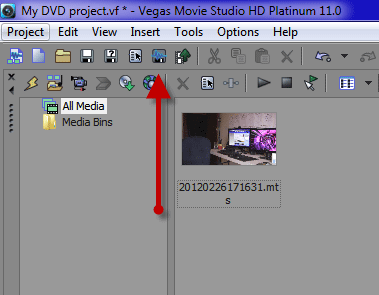 Press "Render As" icon from toolbar or select it from the Project drop down Menu.
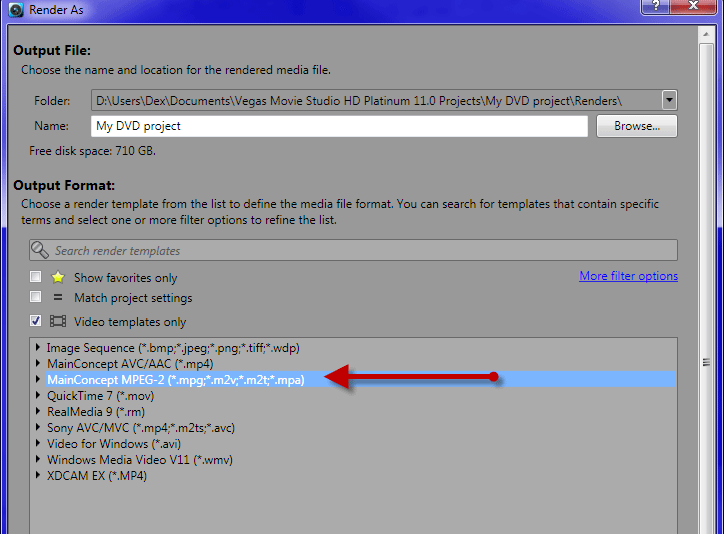 Notice that in Version 11 I have selected the "Video Templates Only" filter.
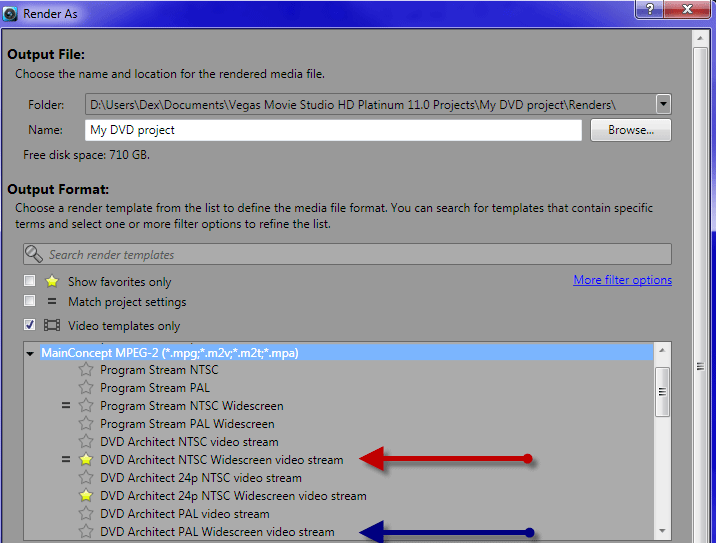 Red Arrow shows NTSC Template to select and Blue Arrow shows PAL Template to select.
 When rendering of Video has finished, just press CLOSE and then prepare to render the Audio file.
Step 2b - Second Render for Audio file only
Make sure you de-select "Video Templates Only"
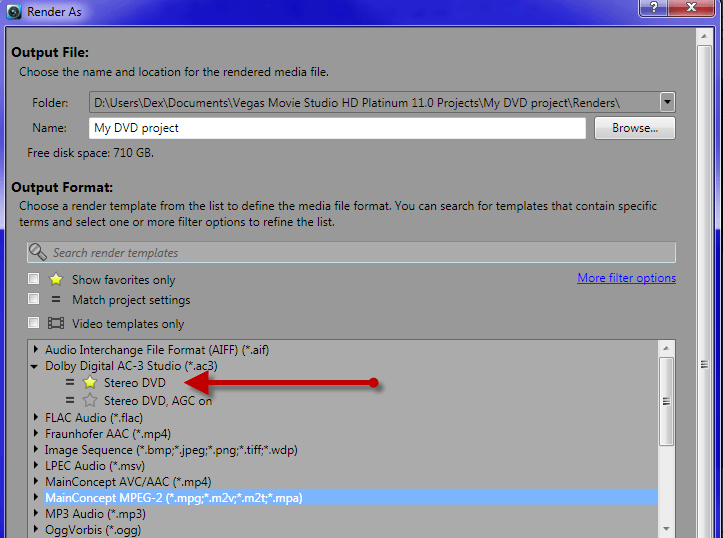 Choose Dolby Digital AC-3 Stereo DVD
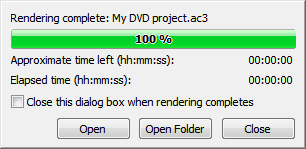 When rendering of Audio file is finished you can select CLOSE.
You are now finished with Vegas Movie Studio. Remember to Save your Project which just saves the actual project files and does not create any videos.
Step 3 - Boot up DVD Architect Studio, Create New Project and Set Properties Corrrectly
Now that you are in DVD Architect Studio 5.0 it is time to Create a New Project with the Wizard, set your Project Properties and tweek a few Preference Settings ready to make your DVD Project.
 Start New Project Wizard
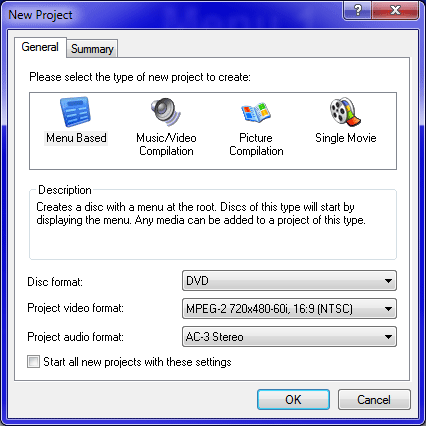 Settings for a Widescreen NTSC DVD
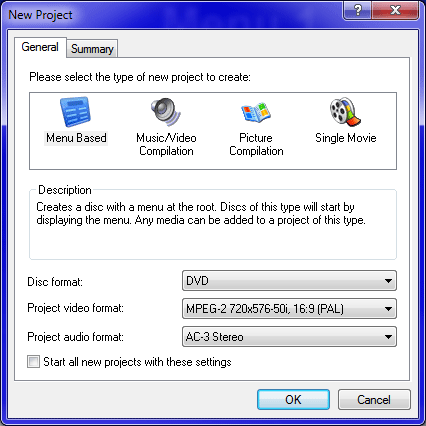 Settings for a Widescreen PAL DVD
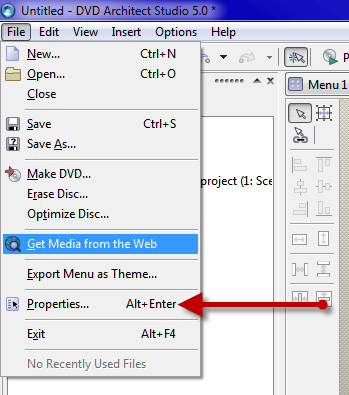 Now select Properties to get these set properly
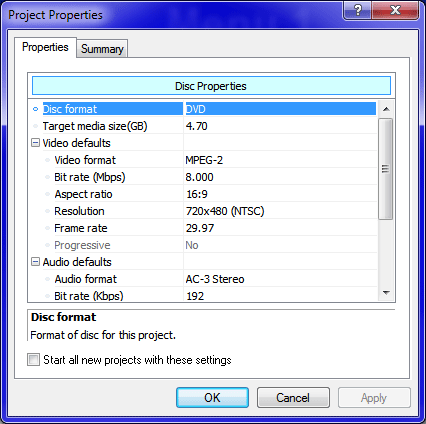 This is what your Property Settings should look like for NTSC users if you are burning to a Single Sided Disc.
If you are a PAL user your resolution will say 720x576 (PAL).
 Go to Options in the top toolbar and select Preferences.
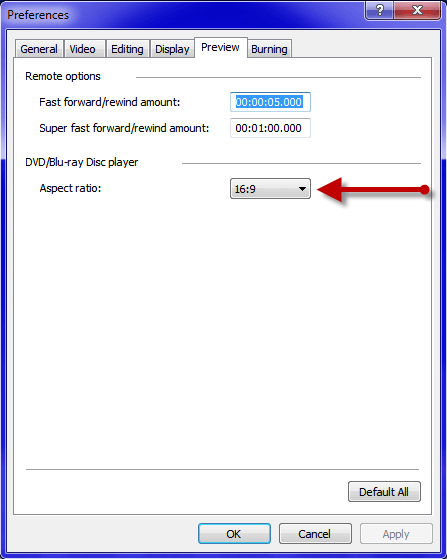 If this is the first time you have ever used DVD Architect and you want to make Widescreen DVD's, then you must change the following setting now.
Step 4 - Importing your Rendered Video from Vegas Movie Studio into DVD Architect Studio 5.0
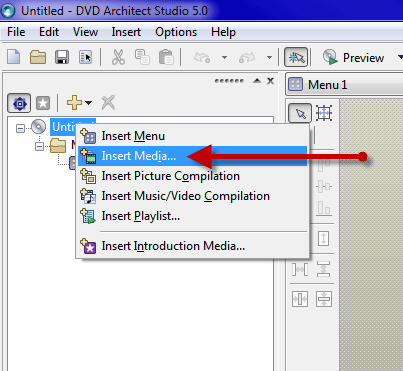 Right-click on top of "Untitled" in the Root Directory for the DVD and select "Insert Media"
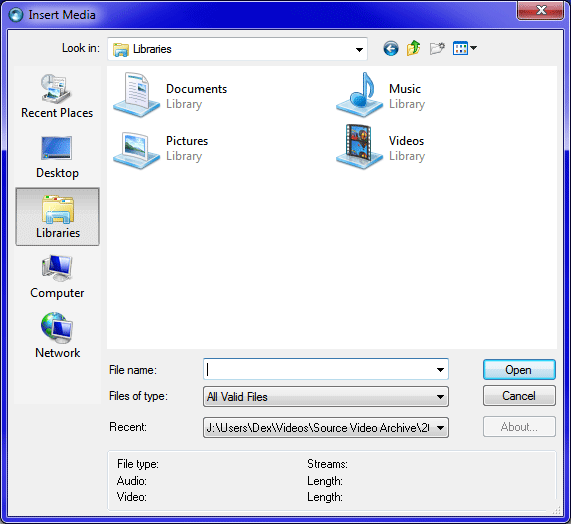 Now I am going to show you the Path to where your Vegas Rendered Videos lives.
Start in your DOCUMENTS Folder and then follow the next couple of screen shots.
 Choose which Version of Vegas Movie Studio you are using.
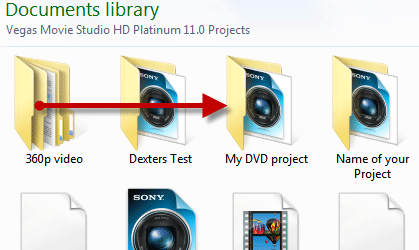
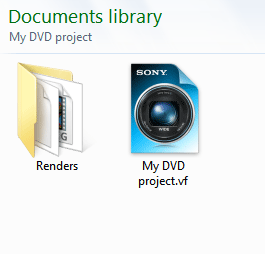 If you used the New Project Wizard in Vegas Movie Studio to start your Project, then you will have these Automatic Folders created for you.
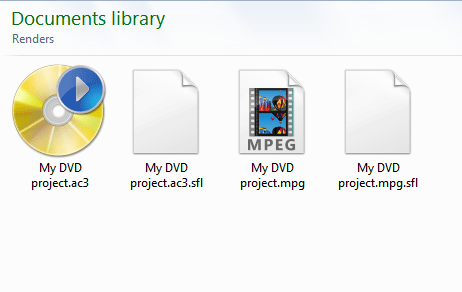 Select your Video.mpg file
You don't have to worry about importing the Audio file because DVD Architect Studio will automatically import and match it up for you.
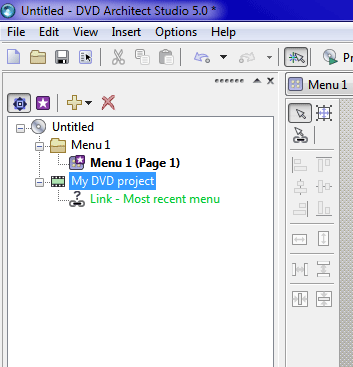 Delete the Broken Green "Link - Most recent menu"
Then drag your Video file "My DVD Project" onto the Menu 1 screen
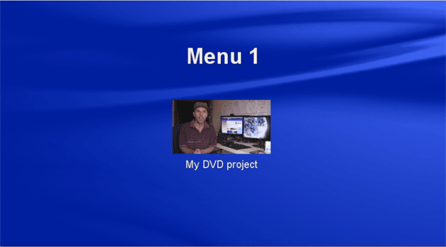
 Your Disc Root Directory should now look like this.
This is where this article now ends.
To learn how to create features within your menu and to burn the actual DVD, I suggest you now watch some of my other Video Tutorials on how to make DVD's.
If you want to skip to Previewing your DVD and then Burning it right now, then press the "Preview" button in the top toolbar of DVD Arhcitect right now and then press "Make DVD" and follow the prompts to burn your disc.
All the best :)
How to make a Basic DVD Part 1 using Vegas Movie Studio HD Platinum 10 & DVD Architect Studio 5.0
How to make a Basic DVD Part 2 using Vegas Movie Studio HD Platinum 10 & DVD Architect Studio 5.0
How to make a DVD with MENUS Part 1 using Sony DVD Architect Studio 5.0
How to make a DVD with MENUS Part 2 using Sony DVD Architect Studio 5.0
How to Add Chapter Points to DVD and BluRay Discs using Vegas Movie Studio HD Platinum 11 and DVD Architect Studio 5.0
