Q: Why does video in the Preview Window look Blurry in Sony Vegas?
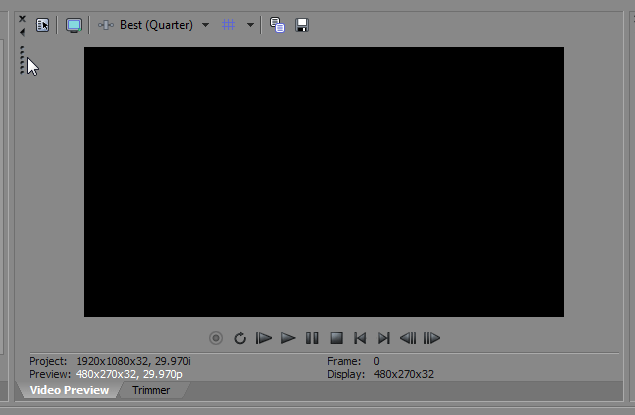
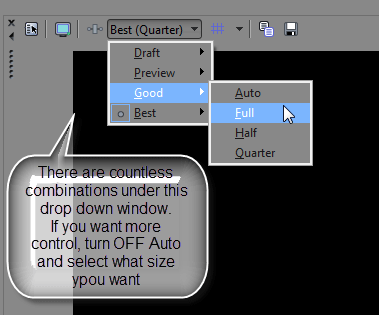
Answer: Please note that the Preview Window in Sony Vegas Pro and Sony Movie Studio Platinum has countless combinations of Quality Settings. Some combinations can produce different problems that my lead the user into believing there is something wrong with their video. There is also a hidden setting on the Timeline, which can make your videos look like they have a lot of Motion Blur.
How to change settings for Preview Window
The most important thing to know is that your Preview Window Settings DO NOT EVER effect the quality of your finished rendered project. Preview Settings are just for while you edit and are designed to improve Playback Performance so that your video plays back as smooth as possible while editing.
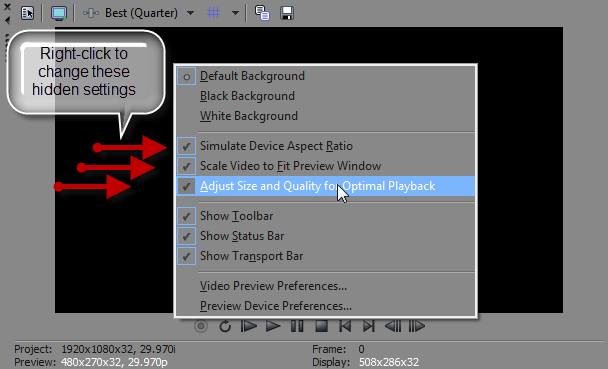
The best way to understand what these different combinations look like, is to spend 10 minutes doing some experiments yourself. I have to admit that when I first started using Vegas, I was completely confused for over six months until one day I did a Right-Click on top of the Preview Window.
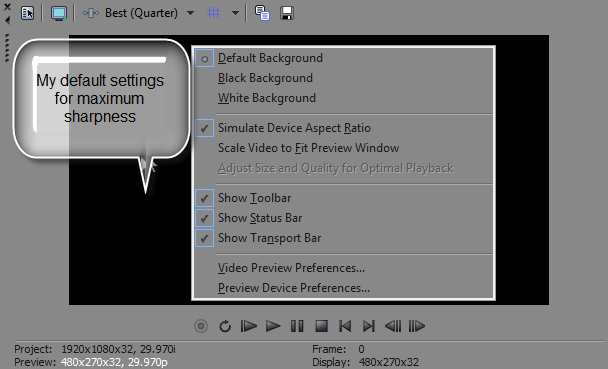
Right-click the Preview Window and turning OFF "Adjust Size & Quality" and "Scale Video". Then change settings to Good or Best (Quarter) or (Half), and drag out surrounding desktop to see full display.
How to turn off Motion Blur / Re-Sampling
There is a hidden setting in Vegas Pro and Movie Studio that is applied to all videos on the timeline by default. This setting can make certain types of videos look like they have a lot of Motion Blur. Most experienced users of Sony Vegas Pro and Movie Studio, turn this setting off by default for all their projects. The best time to do this is after you have imported all your videos onto the timeline. You can select all your videos as one large group and perform the function just once.
Right-click all videos on the timeline and go to Switches - then set to Disable Re-sample.
Your videos should look instantly sharper, especially if there is a lot of fast movement on your videos.

