In this Vegas Pro tutorial, I show how to add Layer Masks and Colour Correction FX to adjust extremes in Exposure Levels for difficult videos.
Some techniques shown in this tutorial will only work with Vegas Pro, whereas others will work in Vegas Pro and Vegas Movie Studio Platinum. So if you are a Vegas Movie Studio Platinum user, you can still follow along and adapt some of the more advanced techniques using simpler methods.
Sometimes when you shoot a video, you may find some areas are very overexposed, while other sections of the same video are quite dark and underexposed. In this situation, you can't simply add a basic Brightness & Contrast filter to the entire video, otherwise one area will be corrected but the other areas will look even worse than before you added the FX.
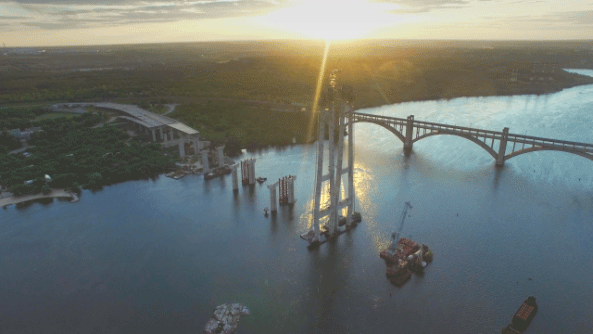
A great example of this problem is commonly seen in videos shot with a drone camera, that were taken during sunrise or sunset. Areas above the horizon maybe overexposed due to the extreme brightness of the Sun, yet everything else below the horizon line will be dark and in shadow.
Another example might be a wedding group standing in the shadow of a large tree. If the camera settings are correctly tuned for the shadow area, anyone standing in bright sunlight outside of the shadow zone, is going to be overexposed. If the camera was set correctly for bright sunlight instead, everyone in the shadow zone is going to be underexposed.
Vegas Pro versus Vegas Movie Studio Platinum
This is one of those tutorials, where using Vegas Pro is a much better option, because of the included Colour Correction Video Scopes and Masking Tool. Using the Video Scopes in Vegas Pro, you will be able to achieve accurate Brightness & Contrast Levels that are Broadcast Safe. Movie Studio users still have access to very similar Video FX, but lack the Video Scopes, so can only adjust levels by using your own eyes.
How to Solve Extremes in Exposure Levels
The basic solution to all the above scenarios, is to clone your videos and create different layer masks for each problem area. Using this technique, you can apply different colour correction effects to different parts of the same video and therefore achieve a more balanced level of exposure for the entire video.
Three techniques shown in video tutorial
Example #1 - Use the Masking Tool to cut out irregular shaped areas
This first method is for Vegas Pro users only and will involve using the Masking tool.
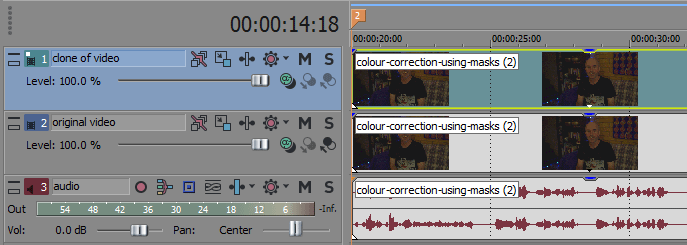
1. Insert a new Video Track above your original video
2. Create a Copy of your video only and place above the original video on the new video track. If your video has audio attached to it, press U for Un-Group first, then copy it. This will make sure you only copy the video component.
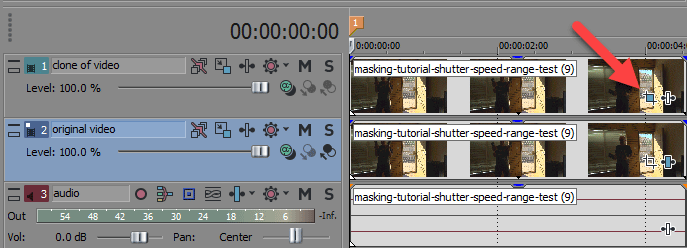
3. Press Event Pan/Crop button on the cloned copy of your video. Next activate the Masking tool in bottom left corner of window and then select the Anchor Creation Tool. Cut out a shape around area of extreme brightness or darkness. Once completed, you can temporarily Mute the bottom video track and see the shape you have just created.
Also set Mask/Apply to FX = Yes - in the video tutorial I forgot to mention this!
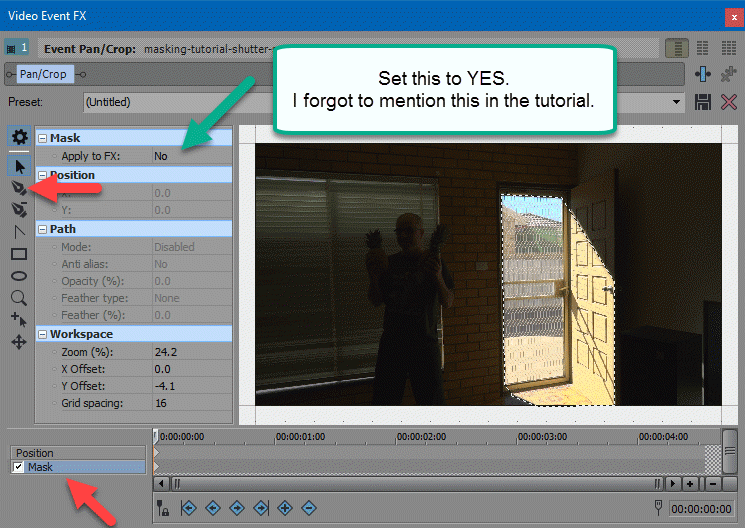
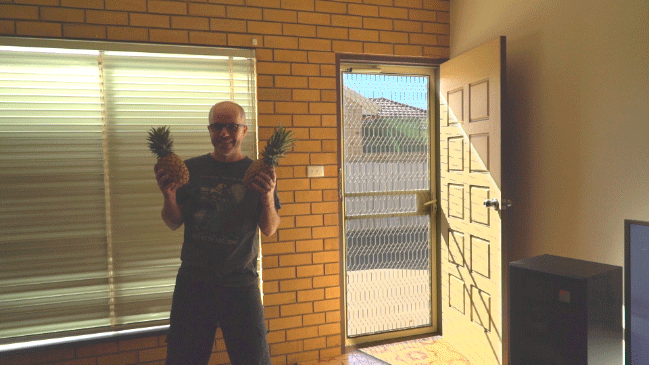
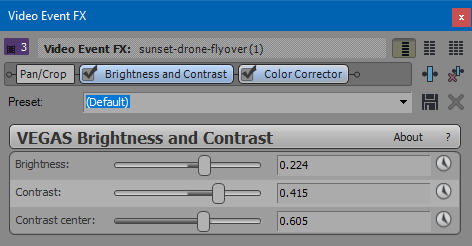
4. Now that a Mask has been created, you can add Colour Correction FX to only the top video "masked area" or the section outside the mask in bottom video. In my example, the masked out section is exposed correctly, so I will leave that untouched. However I will apply Brightness & Contrast to the dark area, by adding this filter to the bottom video only. My example is definitely not perfect here, but the technique shown is what is most important.

Example #2 - Use the Cookie Cutter Tool to cut out a basic geometric shaped area
This second method is more suitable for Vegas Movie Studio Platinum users because they do not have the masking tool and cannot mask out irregular shapes. However they can use the Cookie Cutter tool to mask out simple geometric shapes like a circle or square and then apply feathering to soften the border transition between both layers.
1. Just like the first method, you will be creating a clone of the original video on a second video track.
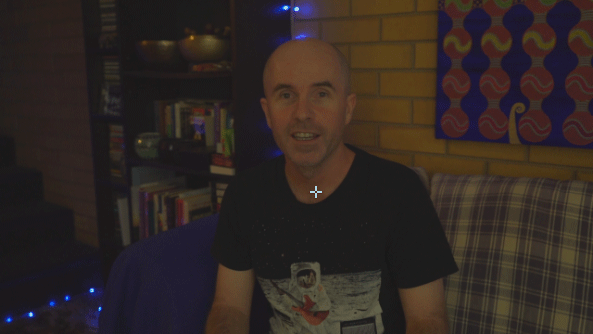 Before correction
2. Next apply the Cookie Cutter tool to the top video track. In my example I used a circle. So that you can locate, resize and reposition the circle over the section of video that needs correcting, it is a good idea to temporarily turn on the Border for the shape you have chosen. Once you have the shape correctly sized and positioned, turn the border off.

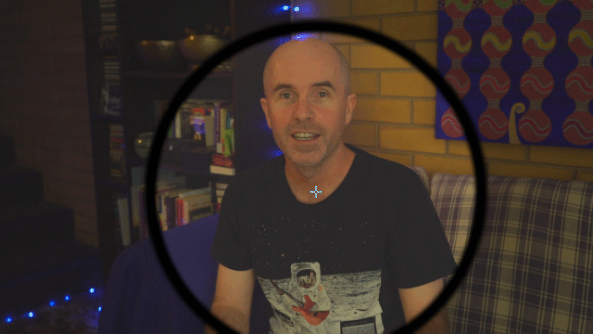 Border applied to Cookie Cutter
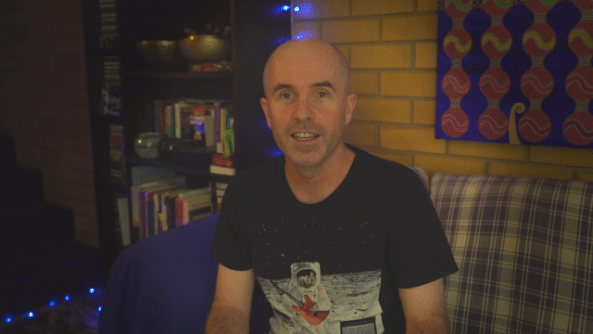 Border removed and Brightness & Contrast applied
Example #3 - Apply a Graduated Layer Mask and Compositing Modes
The third technique shown is the most advanced, however surprisingly it will work in both Vegas Pro and Vegas Movie Studio Platinum. This is the method best applied to video from a drone, where you have horizontal sections of uneven exposure, ranging from extreme brightness to extreme darkness.
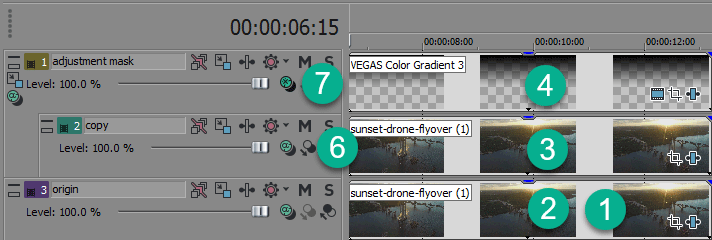
1. With this technique, you need to insert three video tracks on the timeline.
2. Place the original video on bottom video track.
3. Create a Copy of original video and place above on second video track.
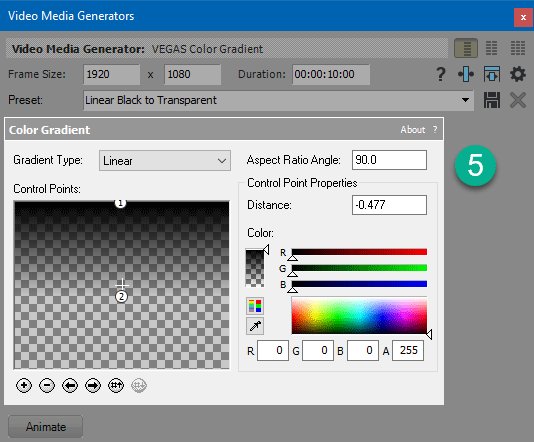
4. Now go to the Media Generators tab, find Colour Gradient and drag the preset Linear Black to Transparent onto the third track that I have labelled adjustment mask.
5. Adjust Colour Gradient as shown in video tutorial.
6. Go to control box for Video Track 2 and set to Make Compositing Child. This tells the top video track to become the parent controller of track 2.
7. Go to control box for Video Track 3 (top track) and set the Compositing Mode to Multiply Mask.
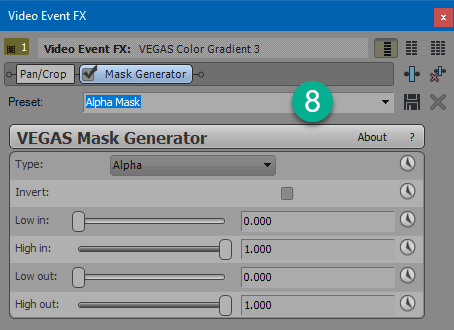
8. Go to Video FX tab and find Mask Generator, then drag Alpha preset onto the top Colour Gradient layer.
9. Once you have completed Step 8, you are now ready to adjust the Brightness, Contrast & Colour for the top section of video which is now controlled by Video Track 2 and bottom section of video which is controlled by Video Track 1 (at bottom). In the video tutorial, I applied Brightness & Contrast to the bottom video track, to make it brighter. I also experimented with adding a touch of extra colour to both the bottom track and middle track.

About Derek Moran
Derek Moran is the author of all articles on Movie Studio Zen.
You can find me on YouTube, Facebook, Twitter, Read more about Derek...

