In this Sony Vegas Pro tutorial, I show how to create Multi-Screen Video FX, so you can display many different videos at the same time using different frame size combinations.
The two main tools we will be using to create Mutli-screen Video FX, are the Track Motion and Event Pan/Crop windows. These controls are also available in Movie Studio Platinum, so Movie Studio users can follow along as well.
Topics Covered in this Tutorial
Video Screen Combinations
Setting up the Timeline and Importing Videos
Working out Screen Sizes and Proportions
Creating Example No.1 - 4 Way Split-Screen
Creating Example No.2 - 2 Way Split-Screen
Creating Example No.3 - 3 Way Split-Screen
Creating Example No.4 - 3 Way Vertical Split Screen
Video Screen Combinations
There are no limitations to how many different Video Screen FX combinations you can create with Sony Vegas Pro and Sony Movie Studio Platinum. Here are the three examples you will learn how to create in this tutorial. Once you learn the techniques I show, you should be able to create whatever you like.


Setting up the Timeline and Importing Videos
If you want to add Multi-Screen Video FX to a large project, you will need to insert plenty of extra video tracks, which will give you the ability to control each video one at a time.
The quickest way to insert New Video Tracks is to use the keyboard shortcut CTRL + Shift + Q
If you need to add extra Audio Tracks as well, use CTRL + Q
Often when working with multi-screen videos, you don't use the audio track recorded with each video. So if you don't need audio, you can import just the Video Component onto the timeline. Drag your videos to the timeline by holding down the right mouse button (not left), then when you let go, select Video Only - Add Video Across Time.
Working out Screen Sizes and Proportions
Working out the width and height of how big you want your videos to be, makes it easier to accurately position and re-size all your videos. In the video tutorial, all videos used are 1920px x 1080px, so all my calculations are based around a normal 1080p video screen size. If your project is using a different screen size like 1290x720 or 3840x2160, you will have to make some adjustments and use a calculator.
Example #1 below, consists of two videos wide by two videos high filling the screen, so to work out how wide each video needs to be, all you have to do is divide 1920 / 2, which is 960px. Because the video height is proportional, you do the same calculation and divide the height in half, 1080 / 2 = 540px. If you wanted to fit 4 videos across and 4 videos high, you would divide 1920 / 4 = 480px and height of 1080 / 4 = 270px.
Creating Example No.1 - 4 Way Split-Screen

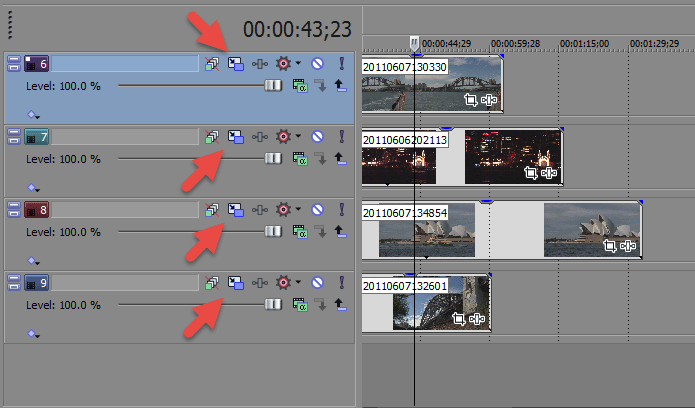
Press the Track Motion button for Track #1
It is really important that you take note of which controls for the Track Motion window are turned ON or OFF. If they do not look similar to what you see in the screen shot below, you may have problems re-sizing and positioning the screen.
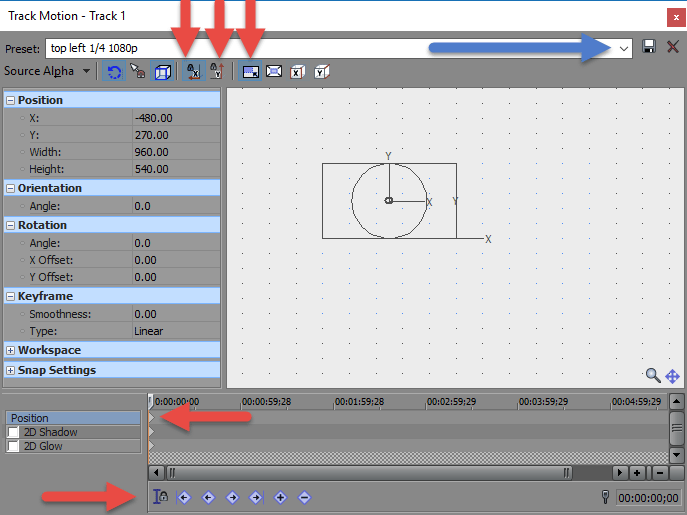
How to work out Frame Sizes and X, Y co-ordinates ?
It doesn't matter what size your original source video is, all you have to do is apply some basic maths to get your Frame Sizes and X, Y positions correct.
For a 4 x way video split, divide the frame width by 2 and divide the frame height by 2, then make sure to write these new numbers down.
To get the base numbers for your X & Y co-ordinates, for X divide the number you just worked out for frame width by 2 and for Y divide the new frame height by 2.
If you enter the X, Y, Width & Height calculations directly into the Position controls for each Video Track, you will get exactly what is shown in example #1. After you enter the data for each video track, you can then save each one as a Custom Preset for the Track Motion window and re-use these presets in future projects.
Calculations for Top Left Video: X = -480, Y = 270, Width = 960, Height = 540
Calculations for Top Right Video: X = 480, Y = 270, Width = 960, Height = 540
Calculations for Below Right Video: X = 480, Y = -270, Width = 960, Height = 540
Calculations for Below Left Video: X = -480, Y = -270, Width = 960, Height = 540
Example No.2 - Two Way Split-Screen

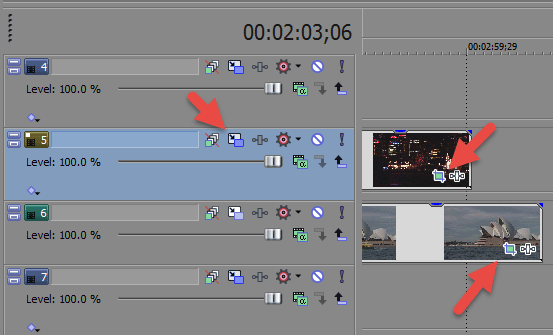
Press the Track Motion button for top video track.
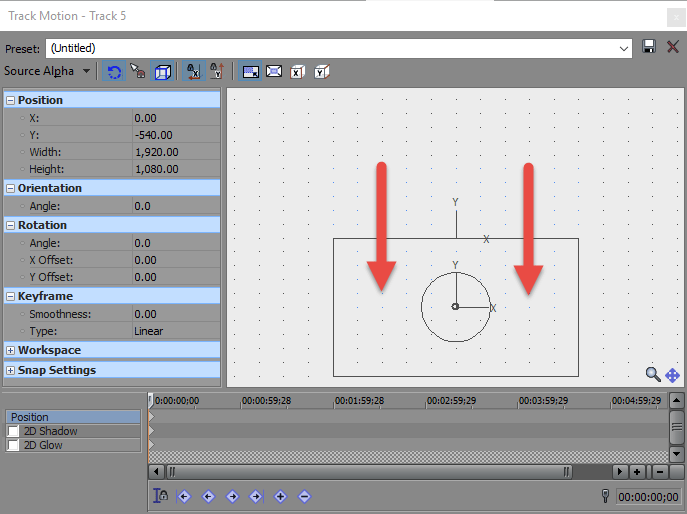
Make sure that movement on the Y-axis is turned ON and X-axis is turned OFF, then drag Video Frame down, until the top edge is sitting perfectly on the center target. A quicker way to do this, is to use the control box and simply enter -540 into the Y axis field. Now both videos have exactly half of the screen to share.
Now press the Event Pan/Crop button inside the top video on timeline.
Then drag Video Frame up or down to bring focus on what is important, by checking what the Preview Window is showing you.
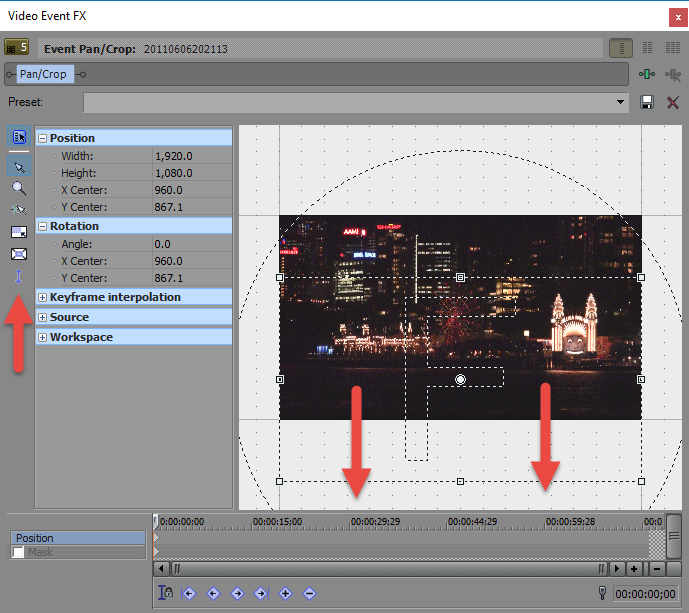
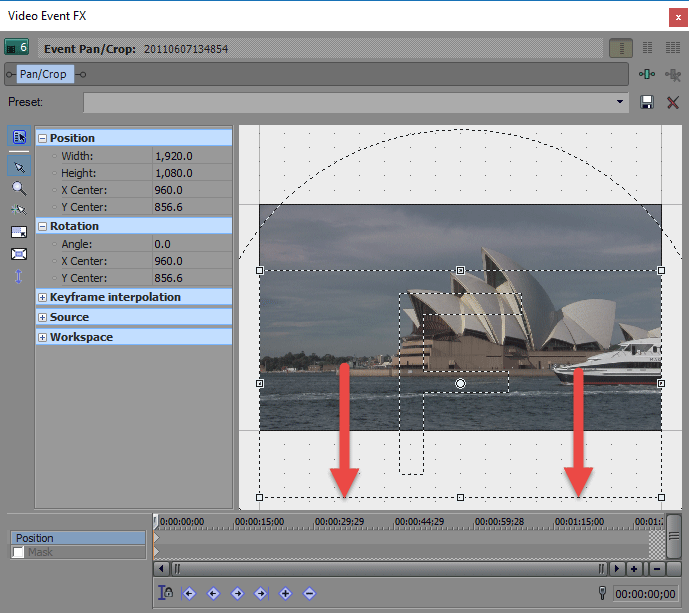
Next press the Event Pan/Crop button inside the bottom video on timeline.
Then drag Video Frame up or down to bring focus on what is important. That's it !
Creating Example No.3 - 3 Way Split-Screen

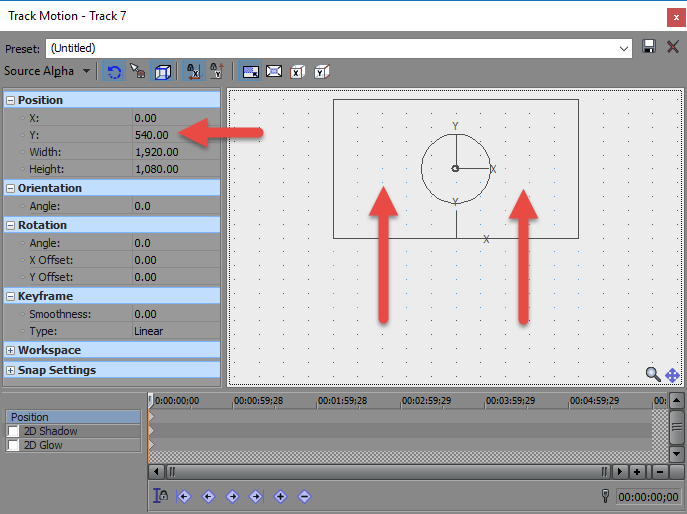
Press the Track Motion button for top video track.
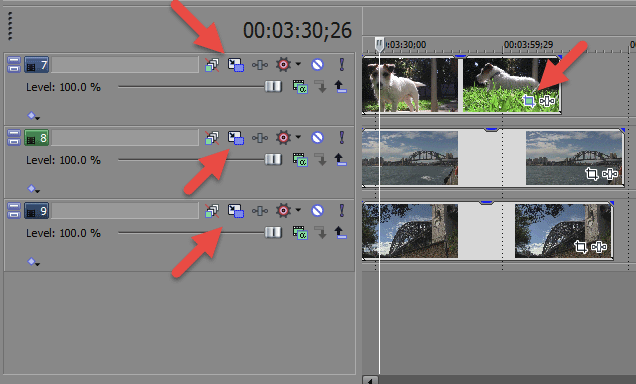
Drag Video Frame up, until the top edge is sitting perfectly on the center target. A quicker way to do this, is to use the control box and simply enter 540 into the Y axis field. Now the top video occupies the top half of screen.
Now press the Event Pan/Crop button inside the top video on timeline.
Then drag Video Frame up or down to bring focus on what is important.
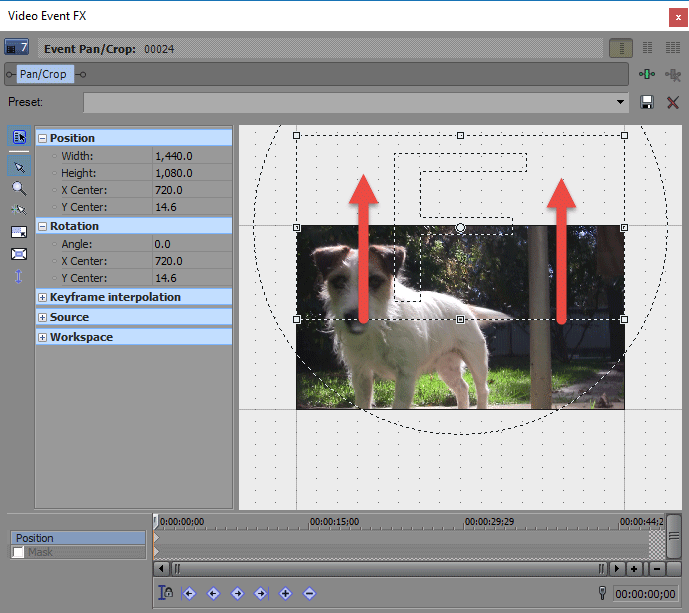
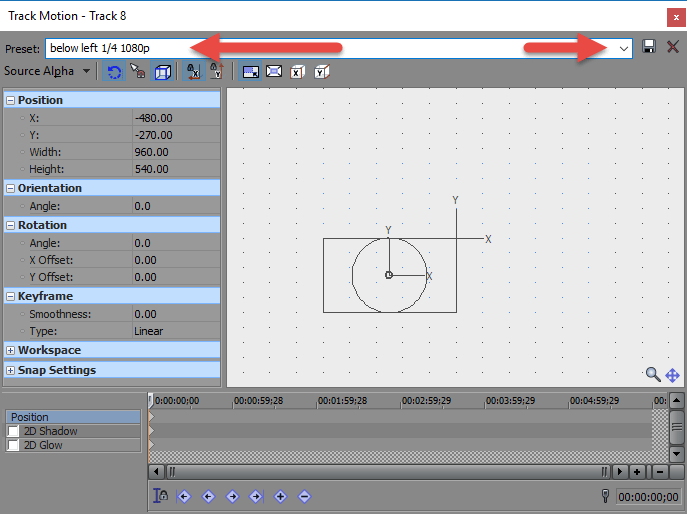
Next press the Track Motion button for 2nd video. Now we can use one of our newly saved custom Presets from Example #1 - select below left 1/4 1080p and video will automatically fit into bottom left corner.
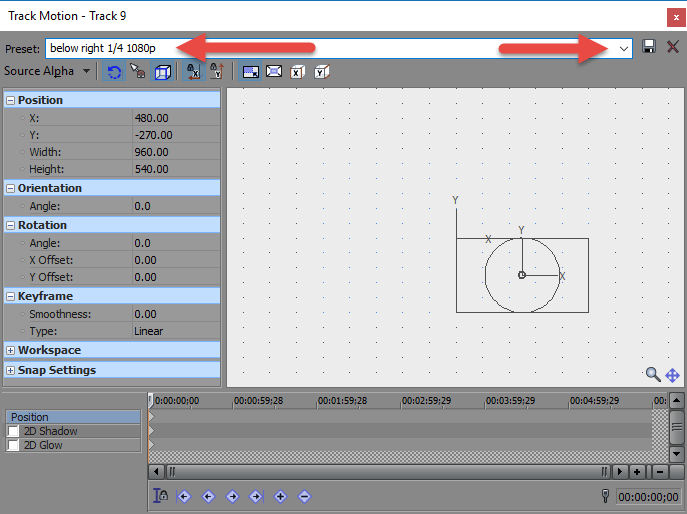
Finally, press Track Motion button for 3rd video, then select below right 1/4 1080p from our custom Presets and video will automatically fit into bottom right corner. That's it ! Now that you know how to use the Track Motion window in combination with the Event Pan/Crop window, you can create an infinite number of Multi-Screen Video FX.
Creating Example No.4 - 3 Way Vertical Split Screen
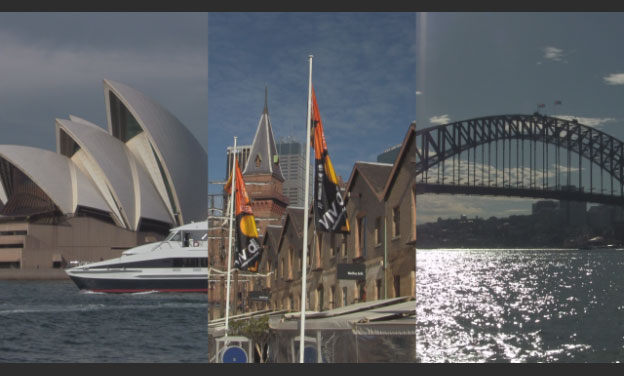
Edit December 2018: I have added this example a few years after posting the original article. This example is using screen shots from Vegas Pro 16. You can still create this effect using any version of Vegas Pro or Vegas Movie Studio Platinum. In this example, we will create a 3 way Vertical Split Screen video effect. Once again, we need to use a combination of both the Track Motion window and Event Pan/Crop window.
We will be creating this effect:
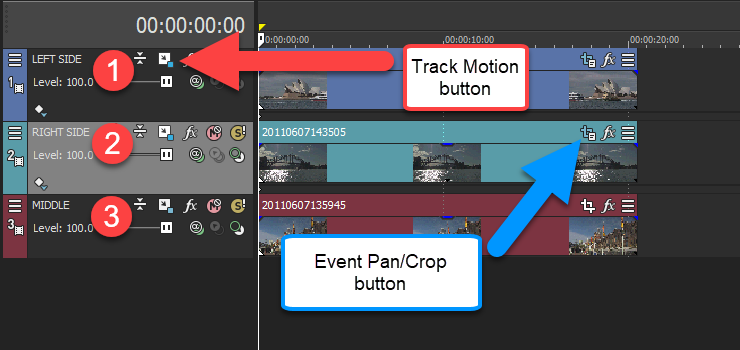
Step 1 - Place video tracks in correct order
Place Left video on track #1
Place Right video on track #2
Place Middle video on track #3
Step 2 - Configure Track Motion for each track
For this example, I will assume you are working with 1920x1080 video. If you are working with a different Frame Size, use the same formula!
To work out the maths, divide 1920/3 = 640
You want to make sure each video is displaying as 640 pixels wide
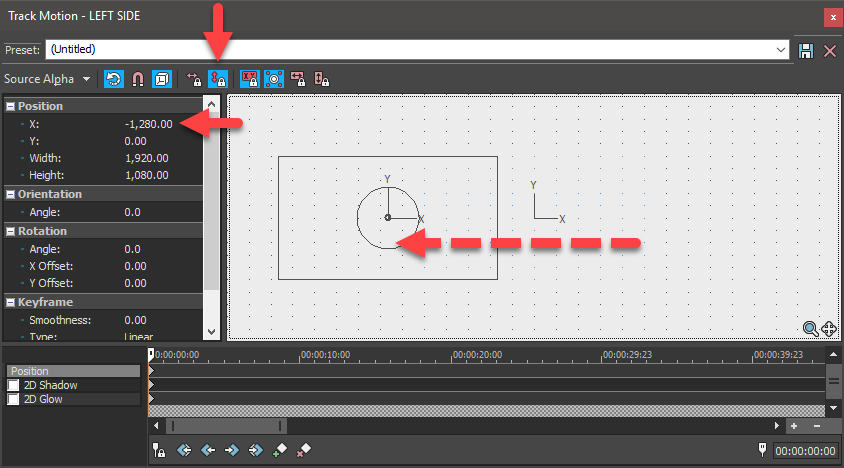
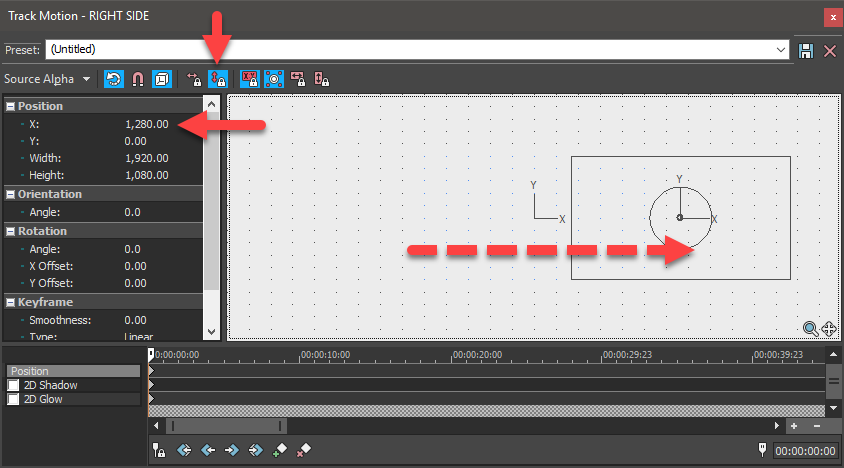
In track motion window, use the X position to position frame correctly.
Left side = 1920-640= -1280
Right side = 1920-640= +1280
To adjust Track Motion for each video track, press the Track Motion button inside of Track Control Box on left hand side.
Track #1 - Left side - Track Motion (inside track control box)
Track #2 - Right side - Track Motion (inside track control box)
Track #3 - Middle - does not need to be changed !
Step 3 - Configure Event Pan/Crop to position talent in middle of frame correctly
Now open the Event Pan/Crop window for each track, one at a time and drag frame left/right.
Track #1 - Left side - push left
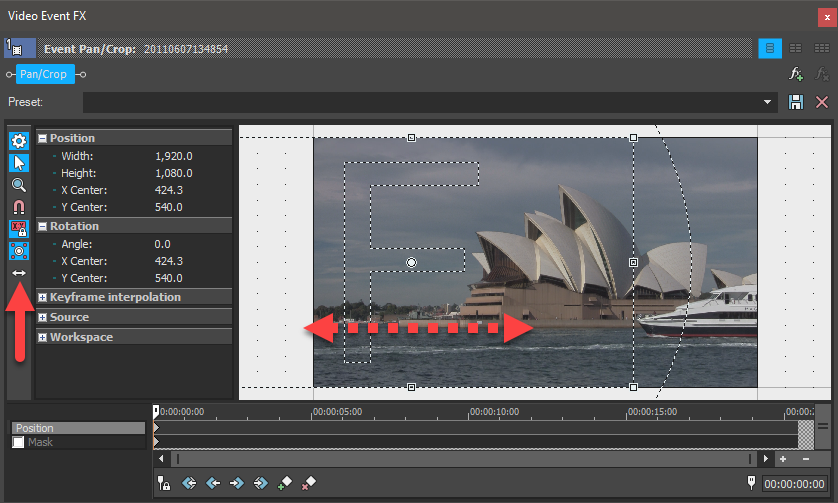
Track #2 - Right side - push right
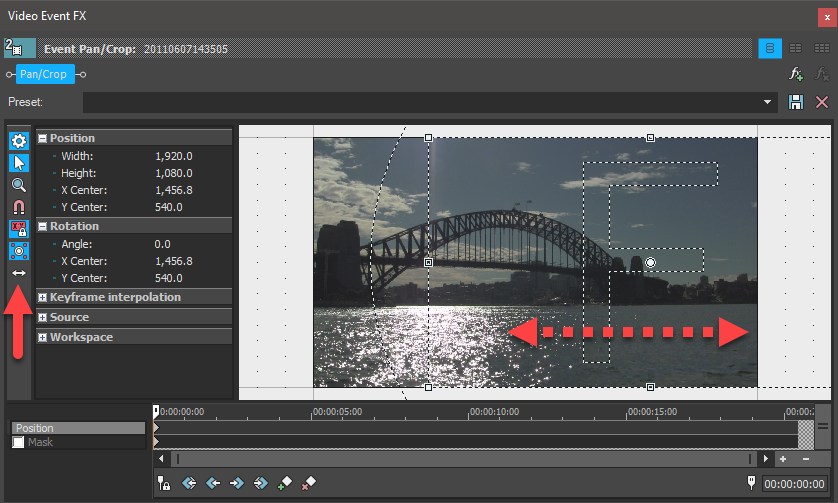
Track #3 - Middle - probably wont need much adjustment at all.
That's it ! 3 way vertical video split is now complete.

About Derek Moran
Derek Moran is the author of all articles on Movie Studio Zen.
You can find me on YouTube, Facebook, Twitter, Read more about Derek...

