Q: Where are the different settings for the Auto Ripple Tool in Vegas Movie Studio Platinum ?
Answer: The three different modes for the Auto-Ripple Tool are now set under the Options Menu.
What does the Auto-Ripple Tool do ?
Auto-Ripple when turned on, allows you to add or subtract media from anywhere on the timeline and have ALL the other media on the timeline shift in sync to the left or right. So if you make a change anywhere on the timeline, you don't have to re-position all the other files manually.
Please read this article here for a better explanation.
Auto-Ripple in Version 13 of Movie Studio Platinum
This is definitely one of the ridiculous changes that was made to version 13 of Movie Studio Platinum. A tool that was already difficult to understand for a brand new user, has now been made even more confusing because of the "new toolbar" design. To use the Auto-Ripple Tool, you now have to do three steps in two completely different areas of the desktop.
How the Auto-Ripple Tool use to work in older versions ?
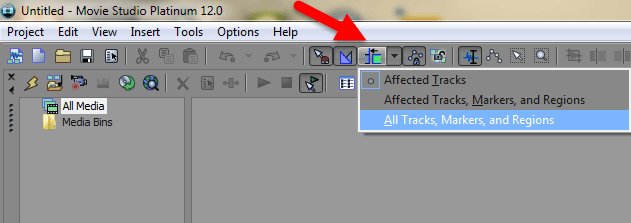
If anyone reading this has an older version of Movie Studio (pre version 13) or is a Vegas Pro user, you will be use to the Auto-Ripple Tool icon being located in the top toolbar and looking like this. Pressing the drop down arrow reveals three modes. This is simple and logical.

Instructions for Movie Studio Platinum 13 users
Step 1
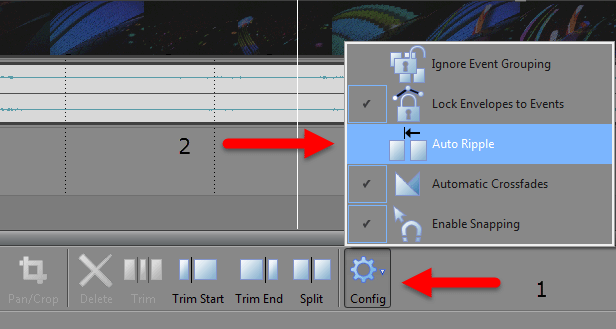
In the new version of Movie Studio Platinum 13, you first have to press Config in the bottom toolbar underneath the timeline and then select Auto Ripple to turn it ON.

Step 2
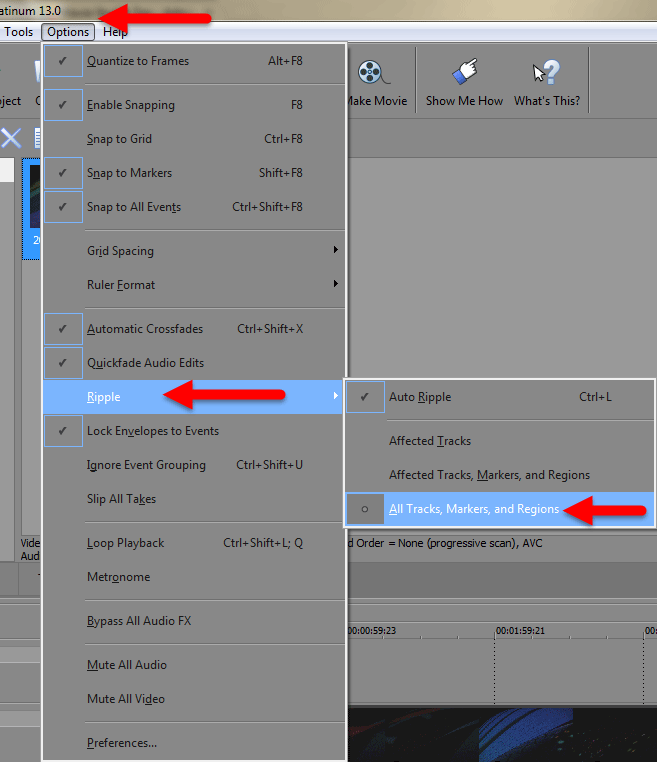
Before you can safely use the Auto Ripple Tool, you first need to set the mode.
Go to Options - Ripple
I really hope that this tool can be simplified in a free update to the program. Please bring back the controls to be fully linked with the icon !

Instructions for Vegas Movie Studio Platinum 14 and 15 users
In version 14 and 15, the Auto-Ripple tool is located here:

Please always remember to turn Auto-Ripple OFF when you are not using it ! Otherwise you will create a giant mess with your project.

