Q: How do I Create a Continuous Playback DVD ?
Answer: To do this you will need to use Sony DVD Architect Studio or DVD Architect Pro.
Most of the magic in DVD Architect is controlled by the Properties Box in the top right corner of the desktop. So I will walk you through what to do with a series of screen shots from the program. I will assume that you already have made a project in Vegas Movie Studio or Vegas Pro, ready to be turned into a DVD. If you haven't got a clue how to use DVD Architect, then at the bottom of this page I will list five tutorials I have already made explaining the basics.
1. Import Your Media
Boot up DVD Architect to get started.
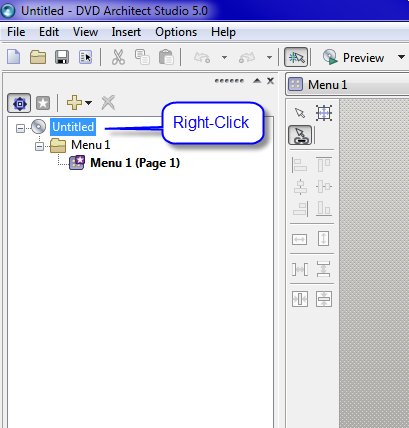
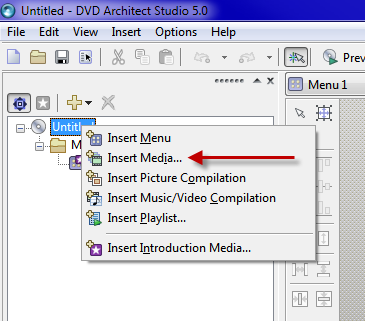
Right-click on Untitled and select Insert Media, then navigate through your computer and select your video. Repeat process if you have more than one video to import.
2. Create a Playlist
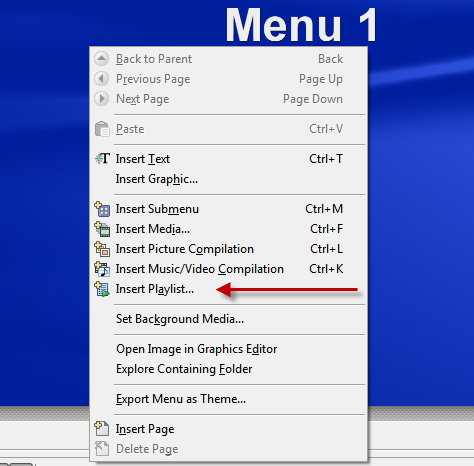
Right click on the blue Menu 1 screen and select Insert Playlist.
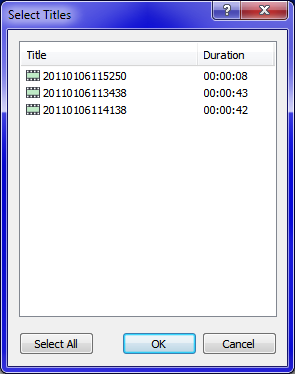
On the next screen press Select All to group all your videos together as a playlist and then press OK.
Your screen should now look like this in the centre.
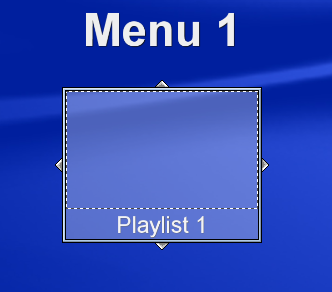
3. Setting the Playlist Button Properties
At this stage you can right-click on the Playlist 1 box and then select Button Style to change the look - Text Only, Image Only or Text & Image.
Now press on top of the Playlist 1 button so that it is highlighted and then press Action in the Button Properties box, which is located in the top right corner of desktop.
Set Auto Activate to equal Yes.
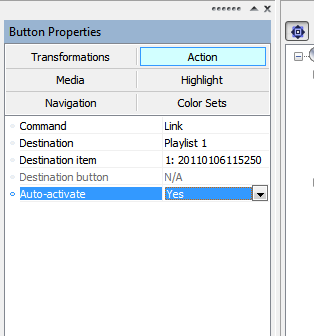
4. Setting the Menu Screen Properties
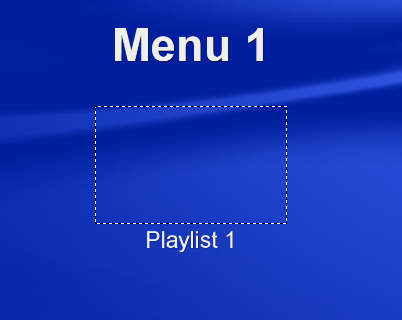
Go back to the Menu 1 blue screen and press anywhere outside of the Playlist 1 button area. This will now change the Properties box (top right corner) to say Menu Page Properties.
Now press End Action.
Next select Command and set mode to Activate button.
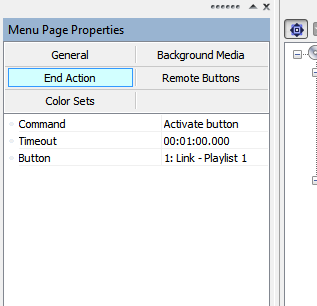
Select Timeout then move your mouse pointer to far right of time value and press the triangle to open up the slider. You are now going to set the time down to the lowest value possible of 00:00:01.000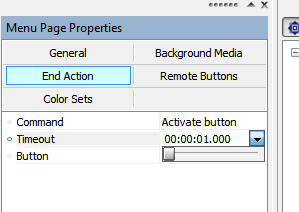
Final setting to change is Button. Set this to Link - Playlist 1.
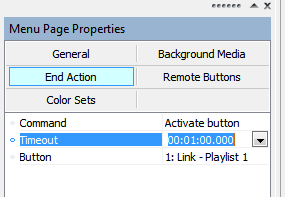
You are now finished with all the settings to make a DVD playback continuously. Next you can press Preview to check that everything is working properly before you burn a disc.
If you need more help with understanding the basics of DVD Architect, then please watch my older tutorials below. Some of the methods I show in the "How to make a Basic DVD" videos, I have now updated. An example of that is how I Imported the videos into the project that I just showed you. The method you have just learnt is the best way to import video if you have already made videos with Sony Vegas Movie Studio.
How to make a Basic DVD Part 1
How to make a Basic DVD Part 2
How to make a DVD with Menu's Part 1
How to make a DVD with Menu's Part 2
How to Add Chapter Points to a DVD

