
DISCLOSURE: Movie Studio Zen is supported by its audience. When you purchase through links on this site, we may earn an affiliate commission.
Solved Gradient

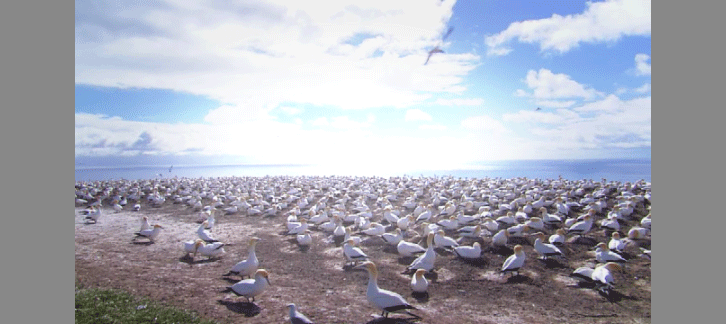
I have a video shot with back lighting. The kids in the front are lit well the ones in the back are washed out. Is there a way to only darken the kids in back with a graduated filter?
by djcentif
Please Log in or Create an account to join the conversation.
If you are using Vegas Pro, you can create a Mask to cut out a Zone around the area you want to adjust.
If you are using Movie Studio Platinum, you can use the Cookie Cutter Tool to create your zone/area for adjustment.
I have used Movie Studio Platinum 13 to show you what to do.
Step 1.
Make sure you have a new Video Track to work with.
CTRL + SHIFT + Q creates a new Video Track.
CTRL + Q creates a new Audio Track.
Step 2.
Create a carbon copy of the video/image that needs adjusting.
A quick way to do this is to hold the CTRL button down, also hold mouse button down over video and then drag copy to new Video Track.
Audio will duplicate as well. Drag new audio to a separate Audio Track.
You don't need a copy of this audio, so right-click 2nd video, go to Group - Remove From. Now delete 2nd audio track.
Step 3.
Re-organise all tracks so they look like this.
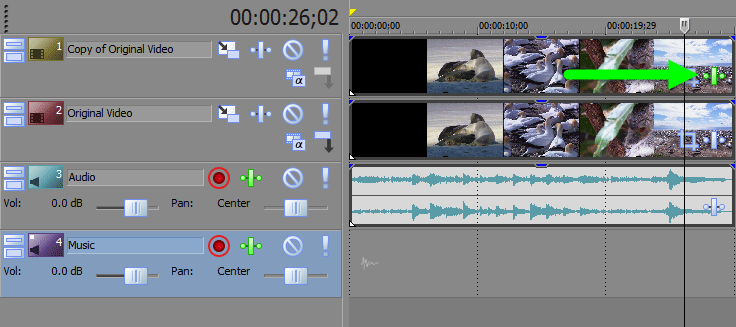
Step 4.
Create adjustment layer.
Go to Video FX tab, open Sony folder and drag Brightness and Contrast onto 2nd (copy) of Video.
There are many different Colour Correction video effects you could select, depending on what works best. You could even add a chain of video fx if needed.
Then also drag Cookie Cutter onto same video.
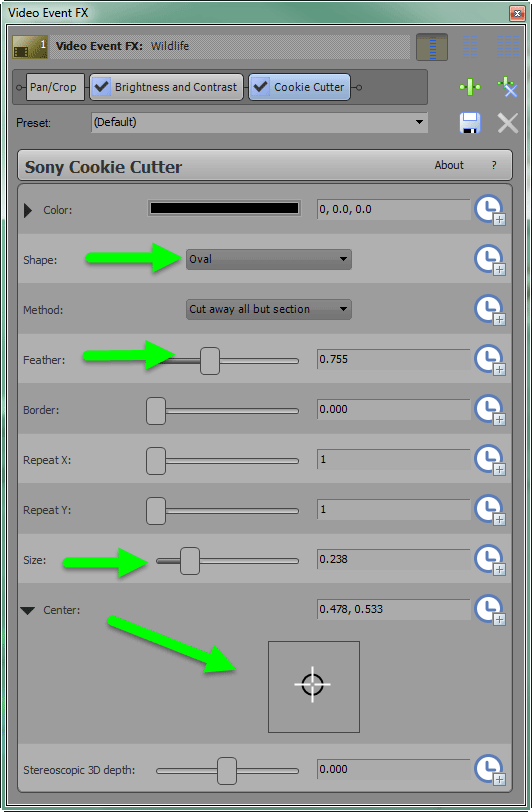
Step 5.
Now it's time to experiment with both effects.
So you can see the area that needs adjusting clearly, select Brightness & Contrast from top of window and increase or decrease the brightness quite a bit. After you mask out the area properly with Cookie Cutter tool, then you can come back the B&C and make proper adjustments.
Step 6.
Open Cookie Cutter controls.
Select a Shape that suits.
Use Feather to blend it in smoothly with original video underneath.
Use Size to re-size.
Use Center to position.
Once you have the best shape and size, you can go back to Colour Correction controls and adjust properly.
Step 7.
If you need to create more complex shapes/areas with Movie Studio Platinum, you can repeat Steps 1, 2 & 3 and create a third copy of the video. Please this on a NEW video track above 2nd video track. Add new Cookie Cutter & Video Fx and create second adjustment area.
I showed a similar process to this in an old tutorial here:
www.moviestudiozen.com/free-tutorials/sony-movie-studio-platinum/76-how-to-blur-out-someones-face-using-sony-vegas-movie-studio-hd-platinum-11
I show how to do proper Colour Correction in this tutorial here:
www.moviestudiozen.com/free-tutorials/sony-vegas-pro/526-colour-correction-tools-sony-vegas-pro
Regards
Derek.
If you are using Movie Studio Platinum, you can use the Cookie Cutter Tool to create your zone/area for adjustment.
I have used Movie Studio Platinum 13 to show you what to do.
Step 1.
Make sure you have a new Video Track to work with.
CTRL + SHIFT + Q creates a new Video Track.
CTRL + Q creates a new Audio Track.
Step 2.
Create a carbon copy of the video/image that needs adjusting.
A quick way to do this is to hold the CTRL button down, also hold mouse button down over video and then drag copy to new Video Track.
Audio will duplicate as well. Drag new audio to a separate Audio Track.
You don't need a copy of this audio, so right-click 2nd video, go to Group - Remove From. Now delete 2nd audio track.
Step 3.
Re-organise all tracks so they look like this.
Step 4.
Create adjustment layer.
Go to Video FX tab, open Sony folder and drag Brightness and Contrast onto 2nd (copy) of Video.
There are many different Colour Correction video effects you could select, depending on what works best. You could even add a chain of video fx if needed.
Then also drag Cookie Cutter onto same video.
Step 5.
Now it's time to experiment with both effects.
So you can see the area that needs adjusting clearly, select Brightness & Contrast from top of window and increase or decrease the brightness quite a bit. After you mask out the area properly with Cookie Cutter tool, then you can come back the B&C and make proper adjustments.
Step 6.
Open Cookie Cutter controls.
Select a Shape that suits.
Use Feather to blend it in smoothly with original video underneath.
Use Size to re-size.
Use Center to position.
Once you have the best shape and size, you can go back to Colour Correction controls and adjust properly.
Step 7.
If you need to create more complex shapes/areas with Movie Studio Platinum, you can repeat Steps 1, 2 & 3 and create a third copy of the video. Please this on a NEW video track above 2nd video track. Add new Cookie Cutter & Video Fx and create second adjustment area.
I showed a similar process to this in an old tutorial here:
www.moviestudiozen.com/free-tutorials/sony-movie-studio-platinum/76-how-to-blur-out-someones-face-using-sony-vegas-movie-studio-hd-platinum-11
I show how to do proper Colour Correction in this tutorial here:
www.moviestudiozen.com/free-tutorials/sony-vegas-pro/526-colour-correction-tools-sony-vegas-pro
Regards
Derek.
ℹ️ Remember to turn everything off at least once a week, including your brain, then sit somewhere quiet and just chill out.
Unplugging is the best way to find solutions to your problems. If you would like to share some love, post a customer testimonial or make a donation.
Unplugging is the best way to find solutions to your problems. If you would like to share some love, post a customer testimonial or make a donation.
Last Edit:02 Oct 2015 20:19 by DoctorZen
Please Log in or Create an account to join the conversation.
Forum Access
- Not Allowed: to create new topic.
- Not Allowed: to reply.
- Not Allowed: to edit your message.
Moderators: DoctorZen
Time to create page: 0.784 seconds
